I recently salvaged a KeepConnect smart plug from Goodwill, and wanted to control it locally from my USB Nugget. I did this project in CircuitPython to keep things simple.

First, the device is a QuickConnect Mk112, which I quickly learned is not a fully smart plug, but actually a smart reboot device. This is meant for remotely rebooting a router if there is an issue.
My concern about the usefulness of this device is if the router is having too many issues, it may fail to let you access this resource, so it may not always work.
When you plug it in and it can't find it's home network, it will create a QuickConnect access point. Joining it leads you to a setup menu where you pick a password and configure the Wi-Fi.
I set my password to "password123", and this password needs to be sent with any web request controlling the device. The username doesn't seem to be important.
Under settings, I selected "Set static IP" so that I can always find this device on my network. This is important, or it may change IP addresses!

There is an app for controlling this, but I have no desire to let it have my data, so I will use the "Trigger manual reset" button on the menu to craft a POST request needed for controlling the reset feature.
OWASP Zap is supposed to be the tool to do this, but when opening the menu page I get this huge vexing error.

Instead, I give chatgpt4 the model number and ask it to look online for the web request. Per the online documentation, it gives the URL I need to trigger the device on and off.

This is what we need to control the device. If you just try to go to the URL endpoint, it is STRICTLY forbidden.

I used Postman to craft the correct request, and this correctly cycled the switch.

Let's write a CircuitPython program for a USB nugget to control the device remotely. We will use CircuitPython's Requests library to send this via our USB Nugget.
For this project, you will need the following libraries from the CircuitPython 9 bundle:
socketpool
ssl
adafruit_requests
adafruit_debouncer
adafruit_displayio_sh1106
Download the bundle, unzip, and add these libraries to your Nugget flashed with CircuitPython 9.
After plugging in your Nugget, you'll see a CircuitPy folder with a code.py and settings.toml file. The settings.toml file will save our Wi-Fi credentials and the IP address of our smart relay. Open the settings.toml file in a text editor and add the following information, then save:
CIRCUITPY_WIFI_PASSWORD = "YourWiFiPassword"
CIRCUITPY_WIFI_SSID = "YourWiFiNetwork"
TARGET_IP = "Your IP Address"
TARGET_PASSWORD = "Your Device Password"
Doing this ensures you don't accidentally commit your passwords if you share your code.py file. Save this file and exit the text editor.
We can access these saved variables locally in our code like this:
ssid = os.getenv("CIRCUITPY_WIFI_SSID")
Now, open the code.py file, and let's make our program. First, import all libraries:
import socketpool
import ssl
import adafruit_requests
import board
import digitalio
from digitalio import DigitalInOut, Pull
from adafruit_debouncer import Debouncer
import busio
import displayio
import adafruit_displayio_sh1106
import os
Next, connect to the Wi-Fi network the smart relay is on.
# WiFi credentials
ssid = os.getenv("CIRCUITPY_WIFI_SSID")
passwd = os.getenv("CIRCUITPY_WIFI_PASSWORD")
# Connect to WiFi
wifi.radio.connect(ssid=ssid, password=passwd)
print("Connected with IP:", wifi.radio.ipv4_address)
Now that we're connected to Wi-Fi, we'll set up the screen. In CircuitPython, setting up the screen will automatically begin outputting serial text to the screen, which is handy and saves us some steps here.
# Set up display
displayio.release_displays()
WIDTH, HEIGHT = 130, 64 # Display size
i2c = busio.I2C(board.SCL, board.SDA)
display_bus = displayio.I2CDisplay(i2c, device_address=0x3c)
display = adafruit_displayio_sh1106.SH1106(display_bus, width=WIDTH, height=HEIGHT)
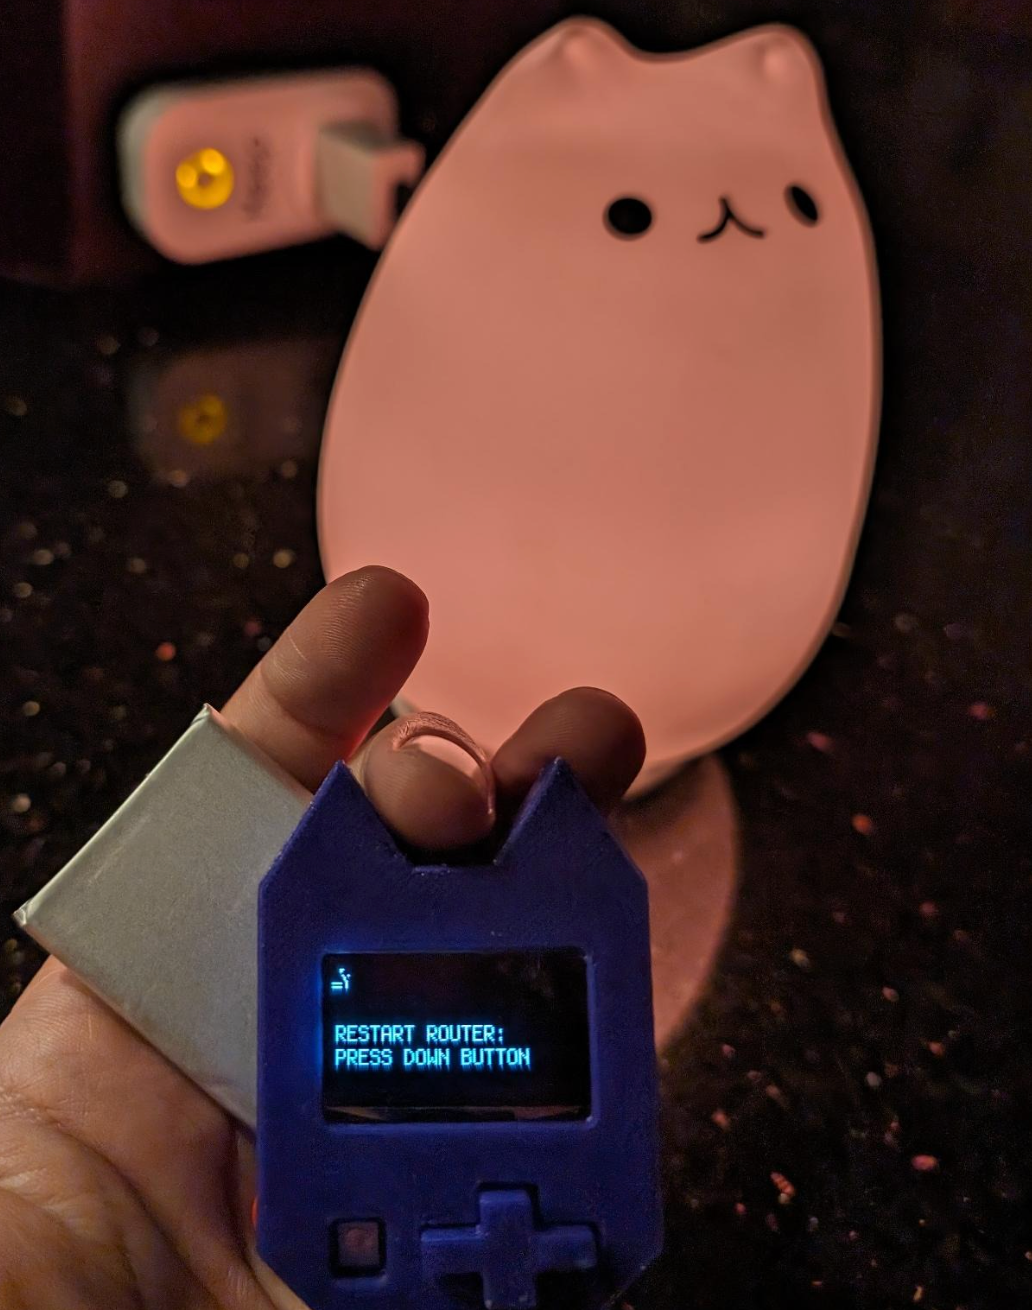
For the last part of the setup, we'll prepare the down button to be pressed for us to fire off the request.
# Initialize down button
down_button_pin = DigitalInOut(board.IO18) # Use the correct pin for your down button
down_button_pin.pull = Pull.UP
down_button = Debouncer(down_button_pin)
Now that everything is set up, we'll define the function to send our post request, so that we can call it whenever the button is pressed.
def send_reboot_request():
pool = socketpool.SocketPool(wifi.radio)
requests = adafruit_requests.Session(pool, ssl.create_default_context())
# Device info and API endpoint
device_ip = os.getenv("TARGET_IP")
device_password = os.getenv("TARGET_PASSWORD")
url = f"http://{device_ip}/remoteReset"
data = {'password': device_password}
# Send POST request
response = requests.post(url, data=data)
return response
Now, we'll write the loop that runs, checking for if the button is pressed and sending the web request if it is. It also prints out the request response, and the status code.
while True:
down_button.update()
if down_button.fell:
print("Sending reboot request...")
response = send_reboot_request()
print(f"Response: {response.status_code}\n{response.text}")
print("DONE!")
time.sleep(10) # Wait for 10 seconds
time.sleep(0.1) # Small delay to reduce CPU usage
That's it! Here is the complete code.
Assuming you loaded the libraries, added the settings.toml file, and saved the code, your Nugget should connect to Wi-Fi and send the web request to reboot once the down button is pressed.
You can use this technique to control any device that uses POST requests to change settings.